One of my stated sewing-related goals for 2013 was to learn more about how to use my serger properly. I received my Brother 1034D as a Christmas gift in December 2011 (thanks, Ma & Pa), so I've owned it for a decent length of time and use it on all my projects. I've done some studying, but even after all this time I haven't felt like I knew exactly what I was doing. I didn't really understand what I was looking for to determine proper tension, or which way to turn the dials when things looked obviously wonky.
The Internet came through once again. Craftsy-- an educational and sharing network for sewers, knitters, quilters, etc -- currently offers a class called Beginner Serging taught by the talented and darling Amy Alan. After reading her bio on Craftsy, I hopped over to her blog, Really Handmade. I was an instant fan of her blog content and knew that she would make a fantastic teacher because she's a fantastic seamstress. Just check out her Colette Anise jacket made from Pendleton wool and vintage leather buttons:
The stars aligned and Amy reached out to me not long after (I guess she discovered my blog around the time I discovered hers, coinky dink), and she asked if I'd take her Beginner Serging course and review it on my blog. Girl, you had me at "Hello."
I will start by saying I really liked this class. My main goal for taking this course was to learn about "problem stitches" and how to fix them. That expectation was met, but I came away with a lot more. Even as someone who has used my serger regularly, I was never bored by the course content and I feel like I learned a substantial amount of information about a variety of topics. My more detailed (and 100% honest) review is below.
SITE INTERFACE AND USER-FRIENDLINESS
A+. Okay, this isn't unique to the Beginner Serging class, but this is the first Craftsy class I've ever taken so I didn't know what to expect. I was incredibly impressed with the site's format, function and features, like the ability to mark your own personal notes at a specific place in the video. For example, when she explained what type of needles to use with the Brother 1034D, I flagged it at 21:48 with my own note so I could easily find this info again later:
Disclaimer: All screenshot images were taken and posted with the permission of Craftsy.
You can also ask questions in the chat box on the right, with photos of the issue you're having (brilliant), and you get an e-mail notice when Amy herself answers them. You can see what other people have asked, too, which can be helpful but is admittedly distracting as the questions continue to scroll up the page. You can hide the chat box, though.
I loved the drop-down bar at the top of the video, which tells you the lesson you're on and lets you easily navigate through all segments. Craftsy magically remembered wherever I left off in a particular lesson, so I could even revisit the very first lesson then immediately shoot back to where I was.
CONTENT AND RESOURCES
Seriously, after watching this class I'm so embarrassed now about how little I knew about my serger all this time. Did you catch my comment above about how I flagged the part where Amy talks about needle type? I DIDN'T EVEN WHAT NEEDLES TO USE. Luckily, my assumption this whole time turned out to be correct. Phew.
The class content is structured in the following way:
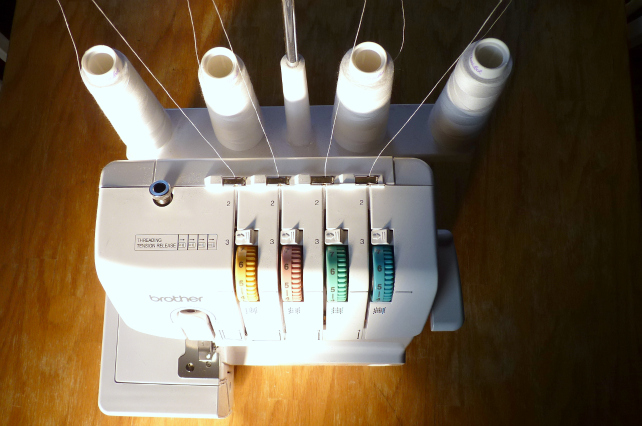
Your Serger & How It Works (machine parts and accessories). Amy introduces three common models of sergers, including a Bernina, Janome and the ubiquitous Brother 1034D, and compares their basic features and functionality. She uses her Bernina for the rest of the course, but she shared enough info in the beginning that I was comfortable proceeding on my own machine based on what she was doing with hers. Sometimes I had to think twice about which direction to turn my dials to make it do what I wanted, but it's so easy to jump back in time to re-watch Amy's explanations. Or, you know, guess.
Basic Stitches - Yeah, I've only ever used the four-thread overlock, but apparently there's a lot more you can do. I honestly don't think I'll use any others for the type of stuff I sew, but I still watched the whole segment for reference in case I do want to do a rolled hem, flatlock, or wrapped overlock one day.
Decorative Stitches - This was mostly about decorative types of thread. Did you know you can serge with yarn in your upper looper? Dang that's cute. But again, not really my thing.
Troubleshooting Your Serger - Now this is what I came for. She talks about stitch/tension issues as well as mechanical issues that may occur, how to spot them, and how to try to fix them. I liked that she showed examples of common tension problems (loops falling off the edge, loops wrapped to one side, rippling, hiccups, etc.) because I feel like I'm constantly fighting with that stuff. My regular sewing machine has auto tension so that's what I'm used to, so when I started using this serger I was in unfamiliar territory. This segment of Amy's class was helpful but I'm still no master, and some of my current problems were not covered (I really DO think I have a dull blade, because even with proper tension my edges are jagged and poke out of the loops... but I still don't know for sure!)
Part of what Amy suggests you do for the class is create serger stitch samples on strips of different types of fabric. Once you achieve proper tension, you write down your machine settings and attach your fabric sample to that handout. These handouts then form a reference manual so you know exactly how to proceed on all your future projects. I love this idea in theory, but when it comes to my sewing I'm admittedly impatient, unorganized and more reactive that proactive. Creating a binder full of stitch samples would be beautiful and wonderful, I KNOW, but I also know I will just never follow through completely. I did do a few, though, just to see how I'd feel about it. I can see the usefulness, for sure:

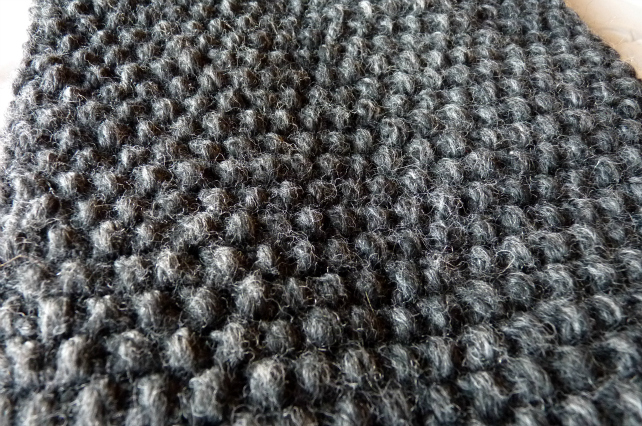
Projects - This part is fun because you feel like you're actually sewing alongside someone, instead of dragging along alone with your grammatically incorrect Burda instructions or whatever. Amy shows how to make three different projects using only your serger: 1) an exposed zipper bag, a project that practices basic four-stitch overlocking and tying off; 2) a ruffled apron that practices ruffling by adjusting your differential feed and needle tension; and 3) a ribbon-striped scarf that practices flatlocking, serging in the round, and decorative edging (shown below).
I thought about making the scarf but I'm not crazy about the look of overlocked edges on the outside of my projects. Now, Amy used rayon thread for the edging of her scarf and it's actually quite beautiful. Instead of rushing out to buy rayon thread that I probably would botch up, I decided to use what was already on hand at home and make the exposed zipper bag. Who can resist a boxy bag?! Mine's made of corduroy (Beignet skirt leftover) and the lining is a linen napkin I knew I wouldn't use for napkining. I even had fusible fleece on hand and I have no idea why.
Quick and satisfying! And now I can say I've inserted a zipper with my serger. Weird, huh.
QUALITY OF INSTRUCTION
Amy is incredibly knowledgeable and her teaching style is very clear and organized. She did a good job explaining the basics without dumbing anything down. She's friendly and easy to watch on screen, which is important for the viewer since you're spending hours watching someone talk at you.
Sometimes the camera angles on the serger weren't ideal, probably due to studio restrictions and the fact that you'd need to swing around a full 360 degrees to see it all. It seemed difficult for them to zoom in on all those tiny monochromatic parts, and show simultaneously what the serger was doing and what her hands were doing. The example I have in mind is when Amy showed how to remove the thread from the lower looper so you can easily unthread the machine. I couldn't quite catch what she was doing, so I still don't really know how to do it. Despite that, I know that Craftsy quality is 100x clearer than all those wobbly, poorly-lit YouTube how-to-sew videos out there.
The only thing I think she could have discussed more was serging with knits, though perhaps that's considered more "advanced" or too specific for the purposes of this class. It seems like one of the reasons people buy sergers is to use it with knit fabric, since the stitches are stretchy by nature. I don't remember the class really talking about that. Amy did talk about the differential feed and the use of ballpoint needles for knits, but a rookie is going to want to serge the heck out of their tissue jersey hems and they're going to be disappointed when they wave out. (Or was that just me, who thought it'd be brilliant to make a cardigan out of the thinnest-weight poorboy rib knit fabric for my FIRST serger project?) While Amy demonstrated using a stabilizer to use when serging delicate fabrics, she didn't talk about using a stabilizer for knits.
CONCLUSION
All in all, I'm very happy with this course and I think it's worth it for any serger newbie (or not-so-newbie, as my case may be) to check out. It's just nice to have all your info in one place, coming from a consistent & trustworthy source, instead of in spotty tutorials spread out over Pinterest, YouTube, internet bookmarks, or your bookshelf. I definitely came away knowing what my stitches should look like, what all the machine parts do, and I have a better understanding of what steps I should take to fix issues and make my seams edges stellar. I even have a cute boxy bag that will hold my sewing supplies when I travel to Sewing Circle on Sundays.
GIVEAWAY!
So if you made it through my rambling, you may be keen to take this class yourself! Maybe you recently bought or received a serger, or you bought one three years ago and it's still in its box. Maybe you just want your stitch quality to be a little better, or are interested in making the projects she teaches. This class could be perfect for you! Because Amy and Craftsy are SO FREAKING NICE, they have offered to give away a free Beginner Serging class to ONE OF YOU!
All you have to do is leave one comment below, stating why you think this class could benefit you. That's it! The giveaway is open until February 21st at midnight EST (a week from today) and I'll announce a winner the next day. Good luck, future serging fiends. Meanwhile, you can ask me any questions you have about the class and I'll be happy to answer.


.JPG)


